Website data is an important asset for every business. Getting to know how people behave on your website, their age and gender, how they got on your website and what do they find most interesting or helpful, is only a small chunk of information you can learn by analysing the data. It’s easy to conclude that having the right information can fuel your business strategy and have a large impact on the growth of your business.
But, before you deep dive into numbers, you should get an analytics tool set up and running. This short guide will help you install Google Tag Manager on your website.
Make sure you are logged into your Google Account before beginning this process.
As you go through this process, you can reference the screenshots below the steps. Where needed, the step number is annotated in the screenshot to help guide you through the process.
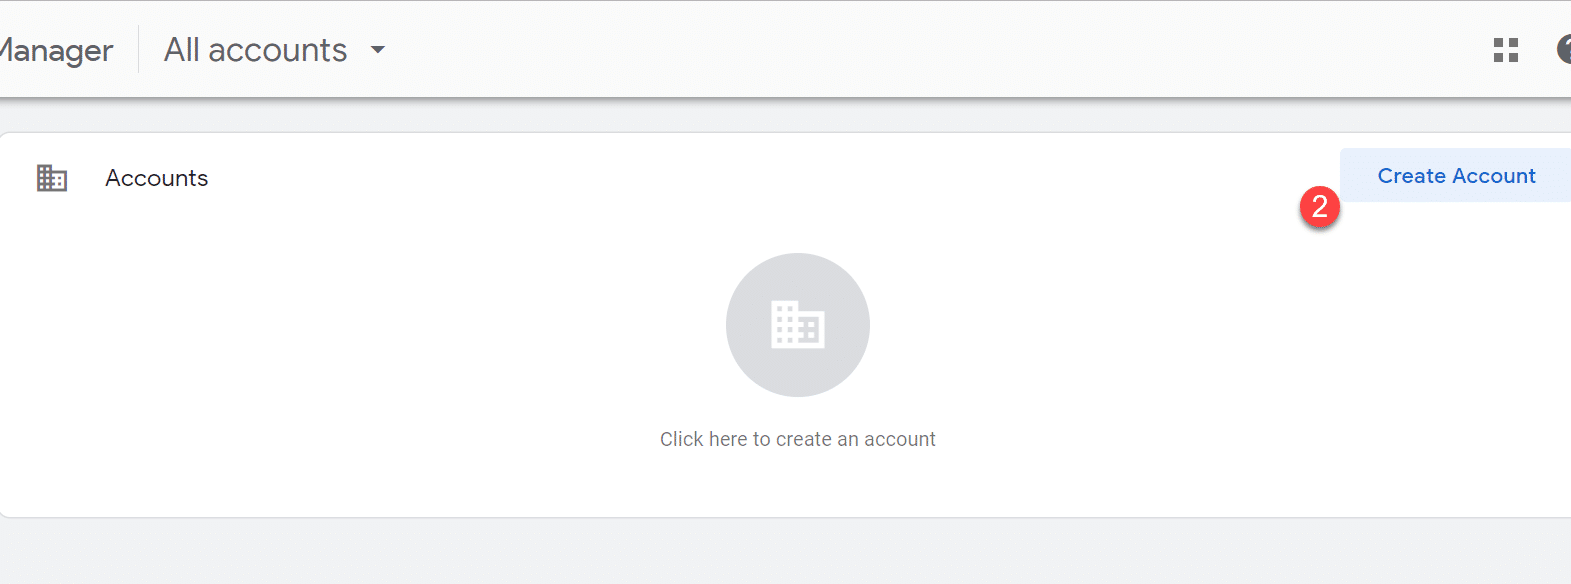
- Go to https://tagmanager.google.com/
- Click Create Account.
- Name the account after your organization (Business Name).
- Set the country. You do not need to share data. Click Continue.
- Name the container for the website property (businessname.com).
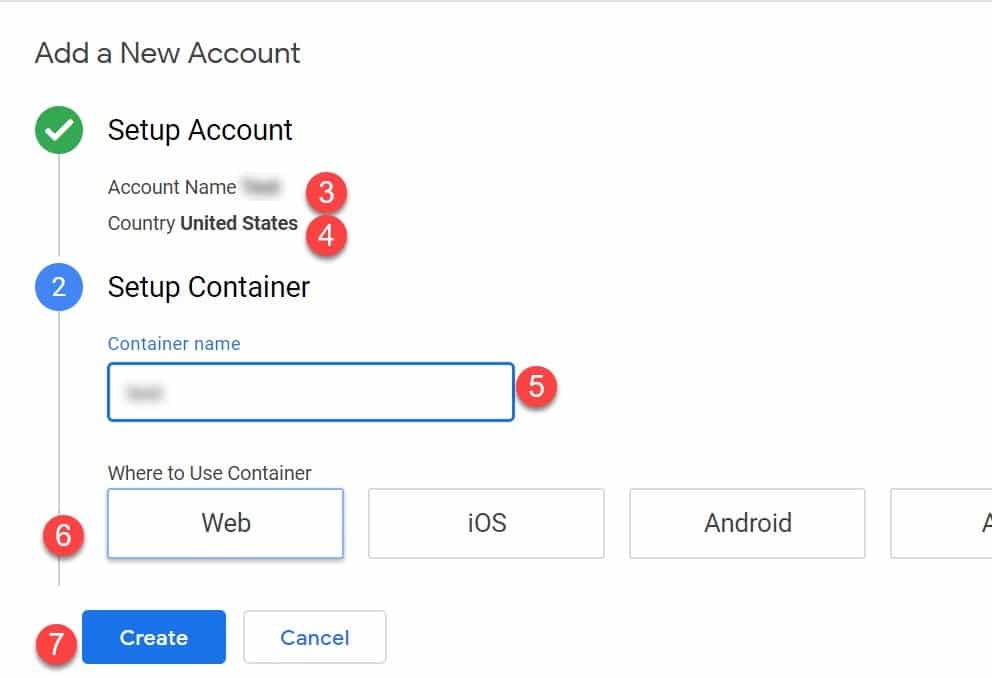
- Click Web.
- Click Create.
- Accept the terms of service.
- Click OK on the code snippet pop-up.
Voilà, you have a GTM account!
Permissions
In order to give someone permission to manage it, go through the following steps. Once again, you will find a screenshot below the steps.
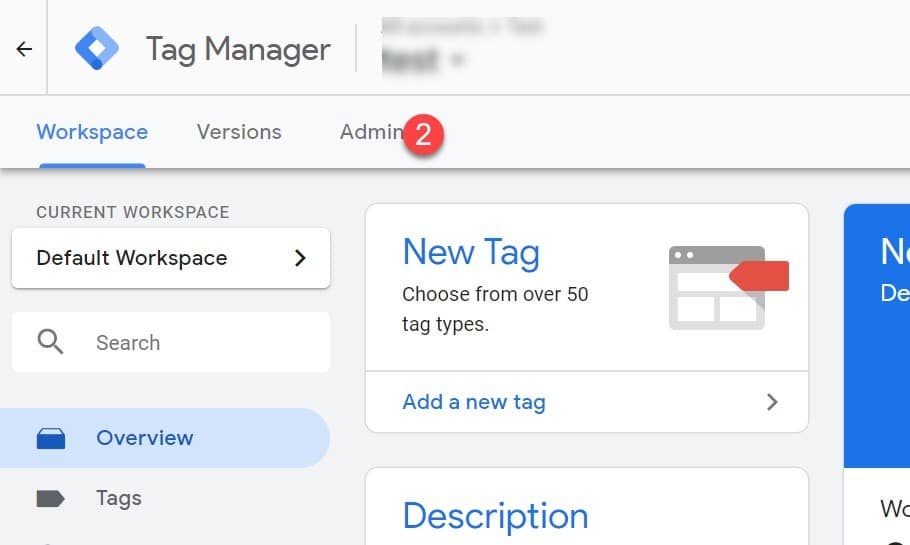
- If you’re not already there, log into GTM, and click on the container you created (businessname.com)
- Click Admin.
- In the column labelled Container, click User Management.
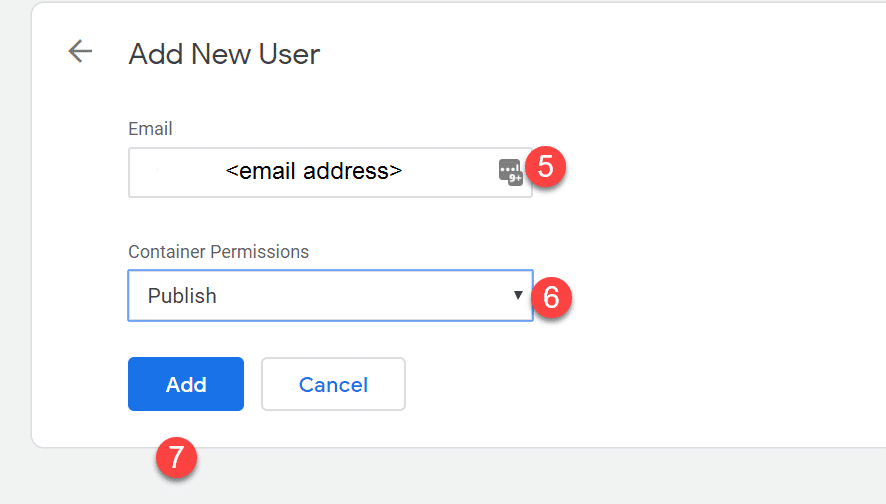
- Click New.
- Enter <email address>.
- Set permissions to Publish.
- Click Add.
If you want to add multiple users, just repeat the steps from 4-7.
Share this
Google Launches Website Call Conversion Tracking

What Is A Landing Page?